Troubleshooting Tips
It’s frustrating when things go wrong, but the following pages contain tips that can
help you determine what the problem is and how to fix it.
Be sure cable connections are secure. Make sure that you are using the right cable
for your operating system. Check if your question is similar to those listed below
and then follow the instructions found in that section:
The printer software won’t install, what’s wrong? See pages 33–35.
Why won’t it print? See
pages 36–39.
What do the flashing lights mean? See page 40.
Is there a problem with your printout? See pages 41–44.
The printer software won’t install, what’s wrong?
What is the problem?
Possible cause
To solve the problem…
I inserted a CD, but the
computer couldn’t read it.
• The CD wasn’t properly
inserted.
OR
• The CD player may be
damaged.
OR
• The CD may be damaged.
1
Reinsert the CD and try again. If this
doesn’t solve your problem…
2
Try inserting a CD that you know works.
If that CD doesn’t work, you may need to
replace your CD player.
3
If other CD’s work but the printer software
CD doesn’t, you may have a damaged CD.
You can download the printer software
from an HP web site (see page 45 for web
site addresses).
4
If you don’t have Web access, contact
HP Customer Care. See page 47, to locate
the phone number nearest you.
34
Getting Help When Things Go Wrong
4
The software did not install
correctly.
• There may be a conflict with
your virus protection
program.
OR
• There may be a conflict with
another software program.
OR
• Your printer software didn’t
install properly.
1
Uninstall your printer software.
For Windows 95, 98, or NT 4.0
a
Make sure the printer software CD is
inserted into the CD-ROM drive.
b
Select
Start
Run
.
c
Click
Browse
, then go to the CD icon.
d
Click
Open
, then click
OK
.
e
When the opening screen for the
software installation appears, select
Remove HP DeskJet 950C Series
software
.
If you are running Windows 3.1x:
a
In the Program Manager, select
File
Run
.
b
Type the letter of the computer’s
CD-ROM drive, followed by
setup.exe
(for example, if the install CD is in drive
D, type
D:\setup.exe
), then click
OK
.
c
When the opening screen for the printer
software installation screen appears,
select
Remove HP DeskJet 950C
Series software
.
2
Close any virus protection programs that
are active. To close (exit) the program,
choose either Step a or b:
a
Right-click on the virus protection
program icon and select
Disable
.
b
Click the
X
in the upper right corner of
the program’s operating window.
3
Exit all of your software programs.
(See 2b above.)
4
Reinstall the printer software. See the
“Install Printer Software” step on the Quick
Start Poster or see page 49 in this User’s
Guide.
If you are still having problems with the
software installation, call an HP authorized
dealer or HP Customer Care. For the phone
number of the HP Customer Care Center
nearest you, see page 47.
The printer software won’t install, what’s wrong? continued
What is the problem?
Possible cause
To solve the problem…
35
Getting Help When Things Go Wrong
4
When I connect a
USB cable between the
printer and my computer,
an “Unknown device”
message appears.
• Static electricity has built up
in the cable between your
computer and printer.
OR
• You may have a defective
USB cable.
1
Disconnect the USB cable from your
printer.
2
Unplug the printer from its power cable.
3
Wait approximately 30 seconds.
4
Plug the power back into the printer.
5
Plug the USB cable back into the printer.
6
If “Unknown device” continues to appear in
the “New hardware found” dialog, replace
the USB cable or use a parallel cable.
When I connect a
USB cable between the
printer and my computer,
the “New Hardware Wizard”
message did not appear.
You may not be using
Windows 98.
Make sure Windows 98 is running and your
computer is connected using a USB cable. If
you do not have Windows 98, you need to use
a parallel cable.
You may not have USB
enabled.
1
In Windows 98, click
Start
Settings
Control Panel
.
2
Double-click the
System
icon.
3
Click the
Device Manager
tab.
4
Click the plus (
+
) icon next to the Univer-
sal Serial Bus Controller option. If you see
a USB host controller and a USB root hub
listed, USB is probably enabled. If you do
not see these devices listed, refer to your
computer’s documentation or contact the
manufacturer for more information on
enabling and setting up USB.
5
If you cannot enable USB, you can always
use a parallel cable to connect your printer
to your computer.
Your USB cable may not be
connected properly.
1
Disconnect and then reconnect the USB
cable from your printer.
2
Make sure that it is securely attached.
The printer software won’t install, what’s wrong? continued
What is the problem?
Possible cause
To solve the problem…
36
Getting Help When Things Go Wrong
4
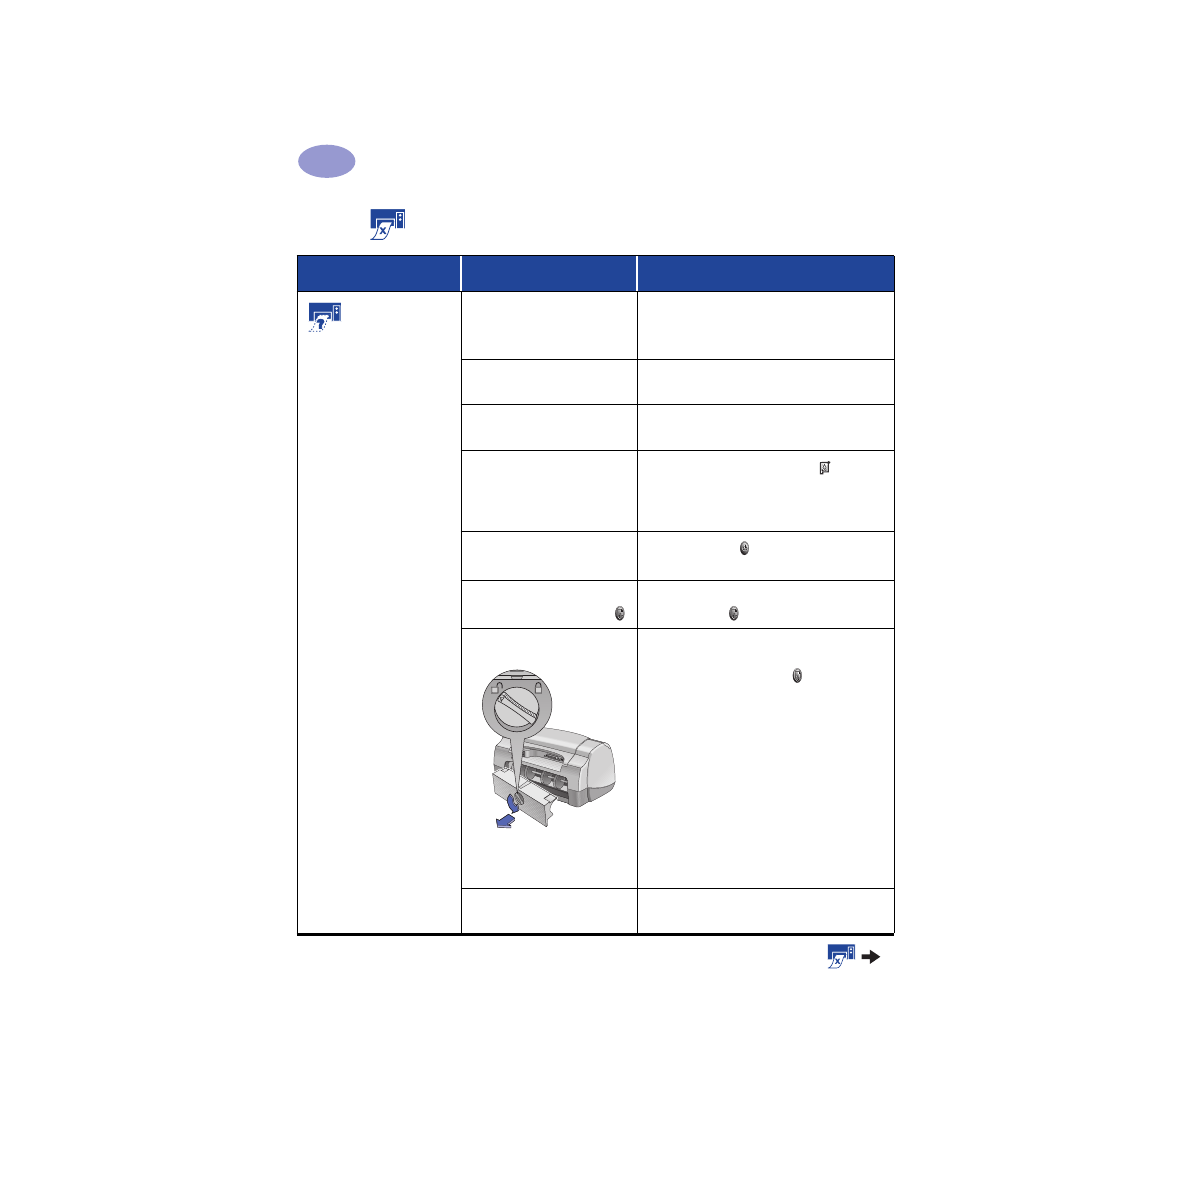
Why won’t it print?
What is the problem?
Possible cause
To solve the problem…
No page came out
of the printer.
Power may be off or there
may be a loose connection.
1
Make sure the power is on.
2
Make sure that all cable connections
are secure.
You may not have any paper
in the IN tray.
Double-check that the media is placed in the
IN tray correctly.
The printer’s top cover may be
open.
Close the printer’s top cover.
A problem may exist with one
of the print cartridges.
If the Print Cartridge Status Light is
blinking, lift the printer’s cover, and check the
Print Cartridge Status. Verify that the print
cartridges are installed properly. See page 27.
The printer may be slow.
If the Power Light is blinking, the printer is
in the process of printing. Be patient.
The printer is waiting for you
to press the Resume Button .
If the Resume Light is flashing, press the
Resume Button .
There may be a paper jam.
1
Pull the paper out of either the IN tray or
the OUT tray.
2
Press the Resume Button on the front of
the printer.
3
If you were printing labels, make sure a
label did not become unglued from the
label sheet while going through the printer.
4
If the paper jam has cleared, print your
document again.
5
If the paper jam hasn’t cleared, open the
Rear Access Door by turning the knob
(counter-clockwise) and removing the
door.
6
Pull the jammed paper out of the printer,
then replace the Rear Access Door.
The Rear Access Door may be
missing.
1
Insert the Rear Access Door.
2
Print your document again.
37
Getting Help When Things Go Wrong
4
A blank page came
out of the printer.
You may be out of ink.
1
Lift the printer cover and check the Print
Cartridge status icons to make sure you are
not out of ink. See “Print Cartridge Status”
on page 25.
2
If you are out of ink, replace the print
cartridge. See “Replacing Print Cartridges”
on page 27.
3
Print your document again.
You may have forgotten to
remove the vinyl tape from
the print cartridge.
Make sure you have removed the protective
piece of vinyl tape on each of the print
cartridges. See “Replacing Print Cartridges”
on page 27.
You may be trying to print
a fax.
1
Save the fax in a graphic format, such as
TIFF.
2
Place it in a word processing document and
print it from there.
Why won’t it print? continued
What is the problem?
Possible cause
To solve the problem…
38
Getting Help When Things Go Wrong
4
I have a USB cable,
and when I try to print I get
a message saying “There
was an error writing to
LPT1.”
You may not have plugged
your USB cable in before
installing the software.
1
Disconnect the USB cable from your
printer.
2
Insert the printer software CD (or Disk 1 if
you have diskettes) into your computer.
3
Click
Start
Run
.
4
Browse the CD, select
Setup
, then click
Open
.
5
The setup.exe file will appear in the dialog
box. Click
OK
.
6
Select the
Remove HP DeskJet 950C
Series software
option to remove the
software.
7
Connect the USB cable to your printer
again. The USB installation screen should
appear again.
8
Repeat the “Install USB software” step. See
your Quick Start Poster or page 50 in this
User’s Guide.
My printer is
connected with a USB cable
through another USB
device or hub and when I
try to print I get a message
saying “There was an error
writing to <name of USB
port>.”
Your printer may not be
getting good data from the
other device or hub.
Connect the printer directly to the USB port
on the computer.
Why won’t it print? continued
What is the problem?
Possible cause
To solve the problem…
39
Getting Help When Things Go Wrong
4
The printer is really slow.
Your computer may have less
than the minimum system
requirements.
1
Check the amount of RAM and processor
speed in your computer. See
“System
Requirements” on page A- 5.
2
Free up some space on your hard drive.
Having less than 100MB of free space on
your computer’s hard drive can mean
longer processing times.
Too many software programs
may be running at the same
time.
Close all unnessary software programs.
You may be using outdated
printer software.
Check the printer driver you are using. Be sure
to check HP’s web site for the most recent
software updates (see page 45 for web site
addresses).
You may be printing a
complex document
containing graphics or
photographs.
Be patient.
You may have chosen 2400
dpi by disabling PhotoREt.
1
If you meant to disable PhotoREt, be
patient.
2
If you didn’t mean to disable PhotoREt, go
to the
Setup
tab and click
PhotoREt
. See
“Setup Tab” on page 6.
You may be using a
USB cable and other USB
devices are in use.
1
Attach the printer’s USB cable directly to
the computer, rather than at the end of a
daisy chain.
2
Avoid using other devices in the daisy
chain while printing.
You may be trying to print
a photo.
Enable Hardware ECP to speed photo
printing.
1
Open the
HP DeskJet Toolbox
(see
page 8).
2
Click on the
Configuration
tab.
3
Check
Attempt to Use Hardware ECP
.
4
Apply
your changes and try printing your
photo again.
Why won’t it print? continued
What is the problem?
Possible cause
To solve the problem…
40
Getting Help When Things Go Wrong
4
What do the flashing lights mean?
What is the problem?
Possible cause
To solve the problem…
The Power Light is
flashing.
Your printer may be receiving
data.
Be patient.
The Resume Light is
flashing.
You may be out of paper.
1
Insert paper.
2
Press the Resume Button .
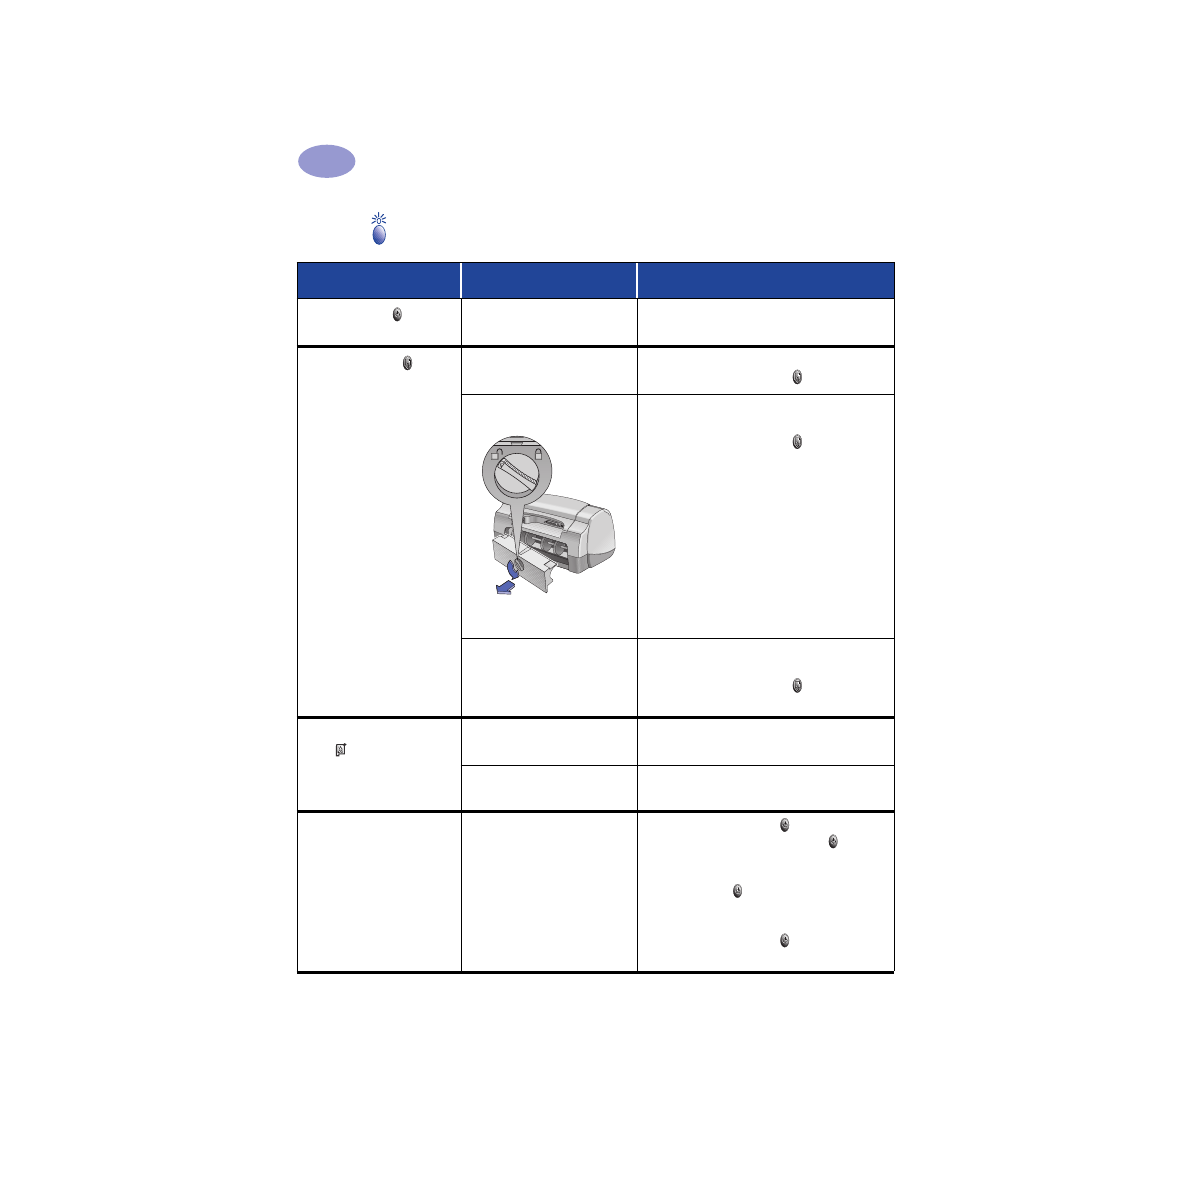
You may have a paper jam.
1
Pull the paper out of either the IN tray or
the OUT tray.
2
Press the Resume Button on the front of
the printer.
3
If you were printing labels, make sure a
label did not become unglued from the
label sheet while going through the printer.
4
If the paper jam has cleared, print your
document again.
5
If the paper jam hasn’t cleared, open the
Rear Access Door by turning the knob
(counter clockwise) and removing the door.
6
Pull the jammed paper out of the printer,
then replace the Rear Access Door.
You may be printing a two-
sided document by hand and
the first side has finished
printing.
1
Follow the on-screen directions for how to
insert the paper.
2
Press the Resume Button .
The Print Cartridge Status
Light is flashing.
The top cover may be open.
Close the top cover.
There may be a problem with
one of the print cartridges.
See
“Print Cartridge Status” on page 25.
All of the lights are
flashing.
The printer may need to
be reset.
1
Press the Power Button to turn the printer
off. Then press the Power Button again to
turn the printer back on.
2
If that doesn’t solve the problem, press the
Power Button to turn the printer off.
3
Unplug the printer.
4
Plug the printer back in.
5
Press the Power Button to turn the printer
on.
41
Getting Help When Things Go Wrong
4
Is there a problem with your printout?
What is the problem?
Possible cause
To solve the problem…
Parts of the
document are missing or
are in the wrong place.
Paper may not be loaded
correctly.
1
Make sure the media is correctly oriented
in the IN tray.
2
Make sure the paper guides fit snugly
against the media.
You may have selected the
wrong paper orientation.
Make sure you have selected the correct
orientation (portrait or landscape) on the
Features
tab. See “Features Tab” on page 7
You may have selected the
wrong paper size.
Make sure you have selected the correct
paper size in the
Setup
tab. See “Setup Tab”
on page 6.
You may have selected the
wrong margins.
Make sure the margins are within the printable
area. See “Minimum Printing Margins” on
page A- 5.
You may have accidentally
left
Poster Printing
on.
Uncheck
Poster Printing
in the
Features
tab.
See
“Features Tab” on page 7.
You may be using the Photo
Tray and the tray has not been
calibrated.
Go to the
Printer Services
tab of the
HP Toolbox
and select “Calibrate the
Photo Tray.”

42
Getting Help When Things Go Wrong
4
Print quality is poor.
You may not be using the best
media.
• Make sure that you are using media
intended for HP DeskJet printers.
• Print quality is dramatically improved if you
print on paper specifically designed for a
certain output (photographs, for example),
rather than using plain paper.
You may be printing on the
wrong side of the media.
Make sure that the media is loaded print side
down.
You may not have selected
the correct paper type in the
printer software.
Make sure that you have selected the correct
paper type in the Setup tab. See “Setup Tab”
on page 6.
You may be printing in Draft
mode.
Click
Normal
or
Best
instead of Draft on the
Setup tab. See “Setup Tab” on page 6.
If you have smearing, you
may be using too much ink.
1
Click
Normal
or
Draft
instead of Best on
the Setup tab. See “Setup Tab” on page 6.
2
Reduce the amount of ink by going to the
Advanced
tab and using the Ink Volume
slider. See
“Advanced Tab” on page 7.
3
Increase the dry time by going to the
Advanced
tab and using the Dry Time
slider. See
“Advanced Tab” on page 7.
You may be printing in
grayscale.
Uncheck
Print in Grayscale
on the
Advanced
tab. See
“Advanced Tab” on page 7.
You may be running out of
ink.
1
Check the print cartridges status. See
Cartridge Status” on page 25.
2
If you are running out of ink, replace the
print cartridge. See
“Replacing Print
Cartridges” on page 27.
You may need to clean the
print cartridges.
See
“Cleaning Print Cartridges” on page 30.
Is there a problem with your printout? continued
What is the problem?
Possible cause
To solve the problem…
43
Getting Help When Things Go Wrong
4
Print quality is poor.
(continued)
You may have forgotten to
remove the vinyl tape from
the print cartridge.
Make sure that you have removed the
protective piece of vinyl tape on each of the
print cartridges. See “Replacing Print
Cartridges” on page 27.
Your print cartridges may be
out of alignment.
If the color and black ink aren’t lining up on
the printed page, go to the
HP Toolbox
and
click
Calibrate the Printer
. See
“Printer
Services Tab” on page 8.
Banners aren’t
printing correctly.
You may have forgotten to
raise the OUT tray.
Make sure that the OUT tray is up.
You may have forgotten to
select
Banner
in the printer
software.
Make sure that you have selected
Banner
on
the
Setup
tab. See
“Setup Tab” on page 6.
You may have problems with
the paper.
• If several sheets feed into the printer
together, unfold and refold the paper.
• If paper doesn’t feed into the printer
correctly, be sure that the unattached edge
of the banner paper stack is toward the
printer (see page 20).
• If the paper creases going through the
printer, the paper might be unsuitable for
banner printing.
You may have problems with
your banner software.
For Windows 95, 98, and NT 4.0
• If gaps in the printing appear at the ends of
the sheets, the problem might be with your
software program. See Release Notes by
clicking
Start
Programs
HP DeskJet
950C Series
.
For Windows 3.1x
• If gaps in the printing appear at the ends of
the sheets, the problem might be with your
software program. See the Release Notes in
the HP DeskJet 950C Series Program Group.
Is there a problem with your printout? continued
What is the problem?
Possible cause
To solve the problem…
44
Getting Help When Things Go Wrong
4
Photos aren’t
printing correctly when I
use the Photo Tray.
You may not have fully
engaged the Photo Tray.
1
Push the Photo Tray Button down and
slowly slide it toward the printer.
2
Stop when you feel resistance. Pushing too
far may crease your photo paper.
You may not have inserted the
photo media correctly.
Insert the photo media glossy side down.
You may not have selected
the appropriate
Paper Type
or
Paper Size
.
1
Go to the
Setup
tab in the printer
software. See
“Setup Tab” on page 6.
2
Select
HP Premium Plus Photo Paper,
Glossy
as the
Paper Type.
3
Select
Photo 4 x 6 in., 102 x 152 mm (with
tear-off tab)
as the
Paper Size.
4
Click
Apply
, and then
OK
.
5
Print your document.
You may not have selected
Best
print quality.
1
Go to the Setup tab in the printer software.
See
“Setup Tab” on page 6.
2
Select
Best
print quality.
Is there a problem with your printout? continued
What is the problem?
Possible cause
To solve the problem…

45
Getting Help When Things Go Wrong
4