Print Dialog Box
You control settings such as number of copies, all or specific pages to print, paper
type, print quality, page layout, color, and background printing from the
HP
DeskJet 900 Series Print
dialog box. To get to this dialog box, select
from
your software program’s
File
menu.
Buttons
There are four buttons at the bottom of every Print dialog box:
•
Save Settings
saves any print settings you select
•
Revert to Defaults
returns your print settings to the original HP-defined
settings
•
Cancel
cancels settings you have entered and closes the Print dialog box
•
starts printing
8
Using Your Printer Software
2
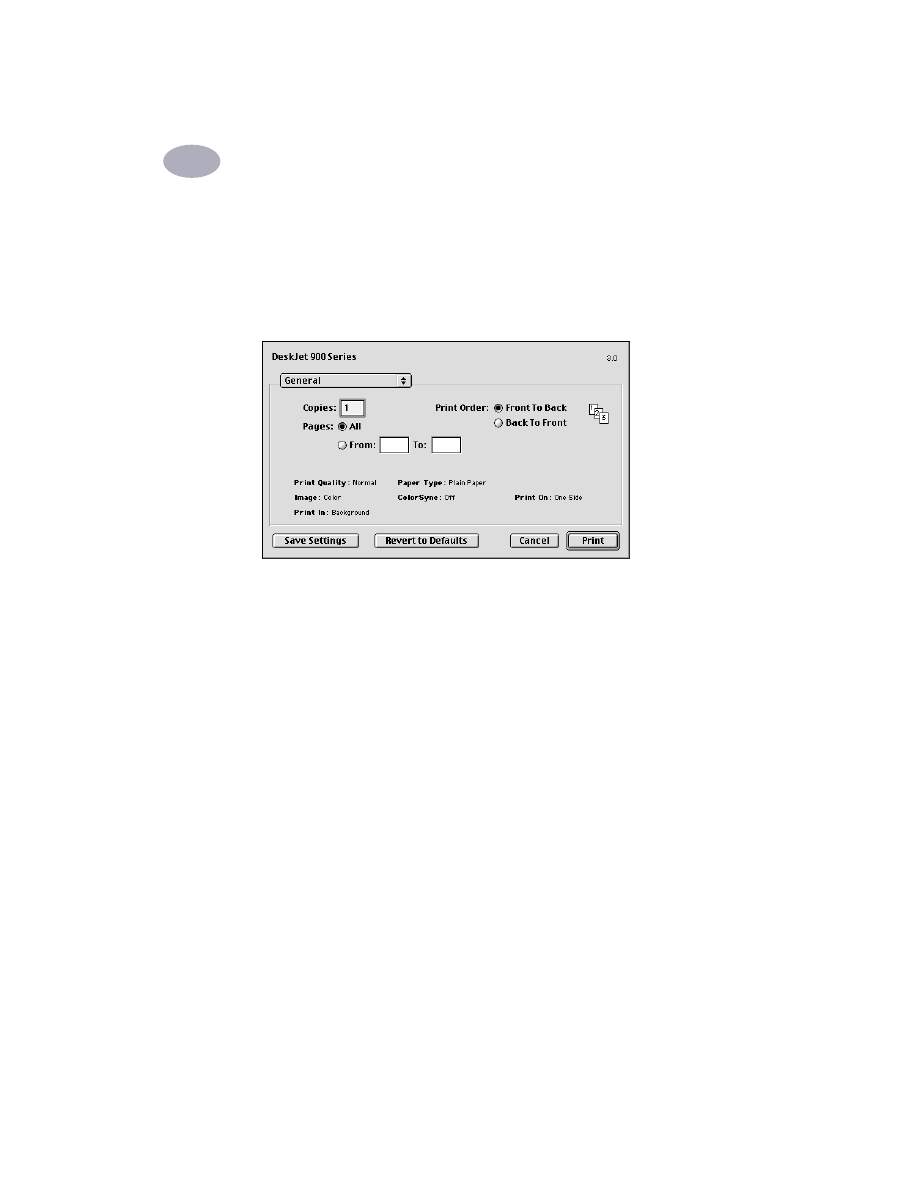
General
General
is the default panel selected in the Print dialog box. This panel lets you
select the number of copies you want to print, whether you want to print the entire
document or select pages, and whether you want to print from the front of your
document or begin printing from the end forward.
You may also access the following print-control panels from the
General
menu:
•
Paper Type/Quality
(see “Paper Type/Quality” on page 9)
•
Layout
(see “Layout” on page 9)
•
Color
(see “Color” on page 10)
•
Background Printing
(see “Background Printing” on page 11)
•
Ink Controls
allows you to adjust the ink volume and dry time.
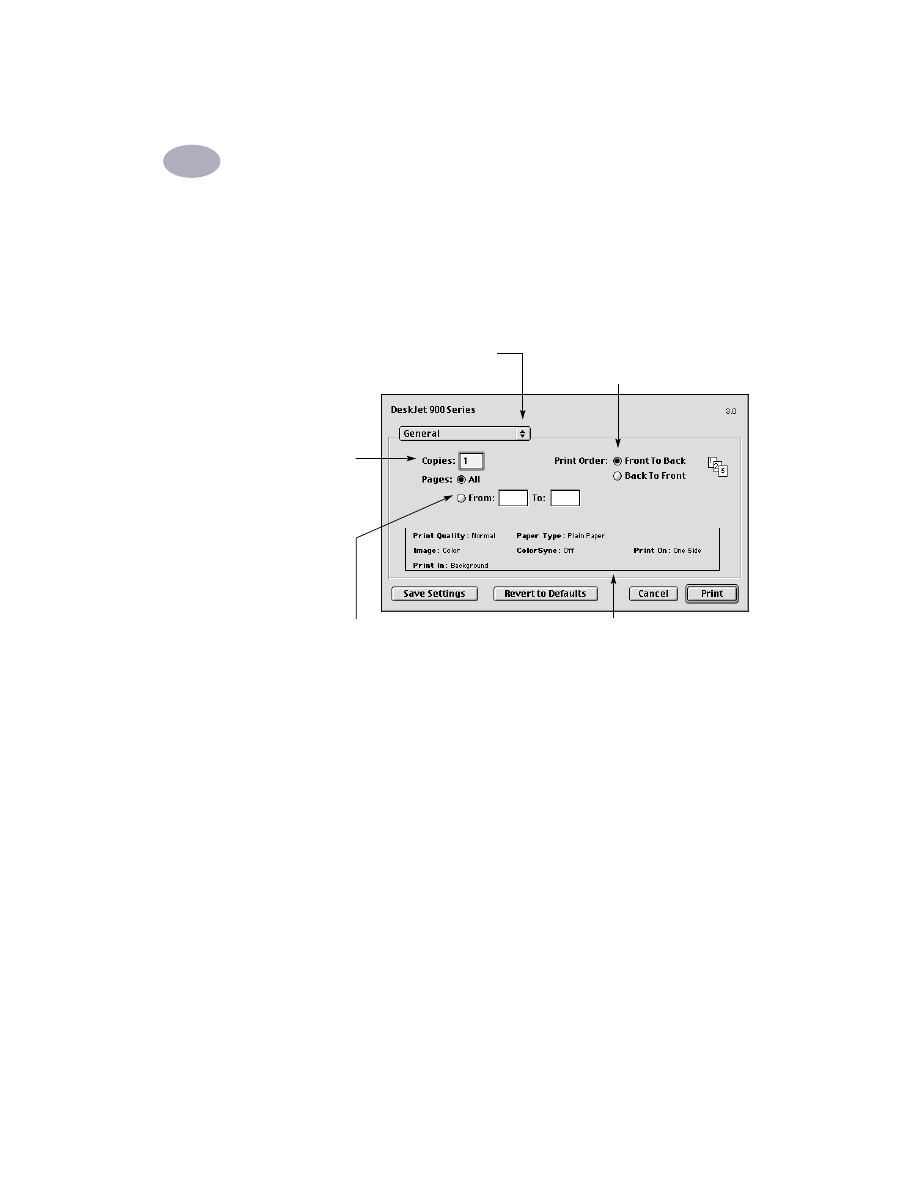
Click to display a list of other
print-control panels.
Enter the number
of copies you want
to print.
Indicate whether you want to start
printing from the first page or from
the last page.
This area displays options set in other
Print panels.
If you don’t want to print the entire document,
enter the beginning and ending page numbers
you want to print.
Using Your Printer Software
2
9
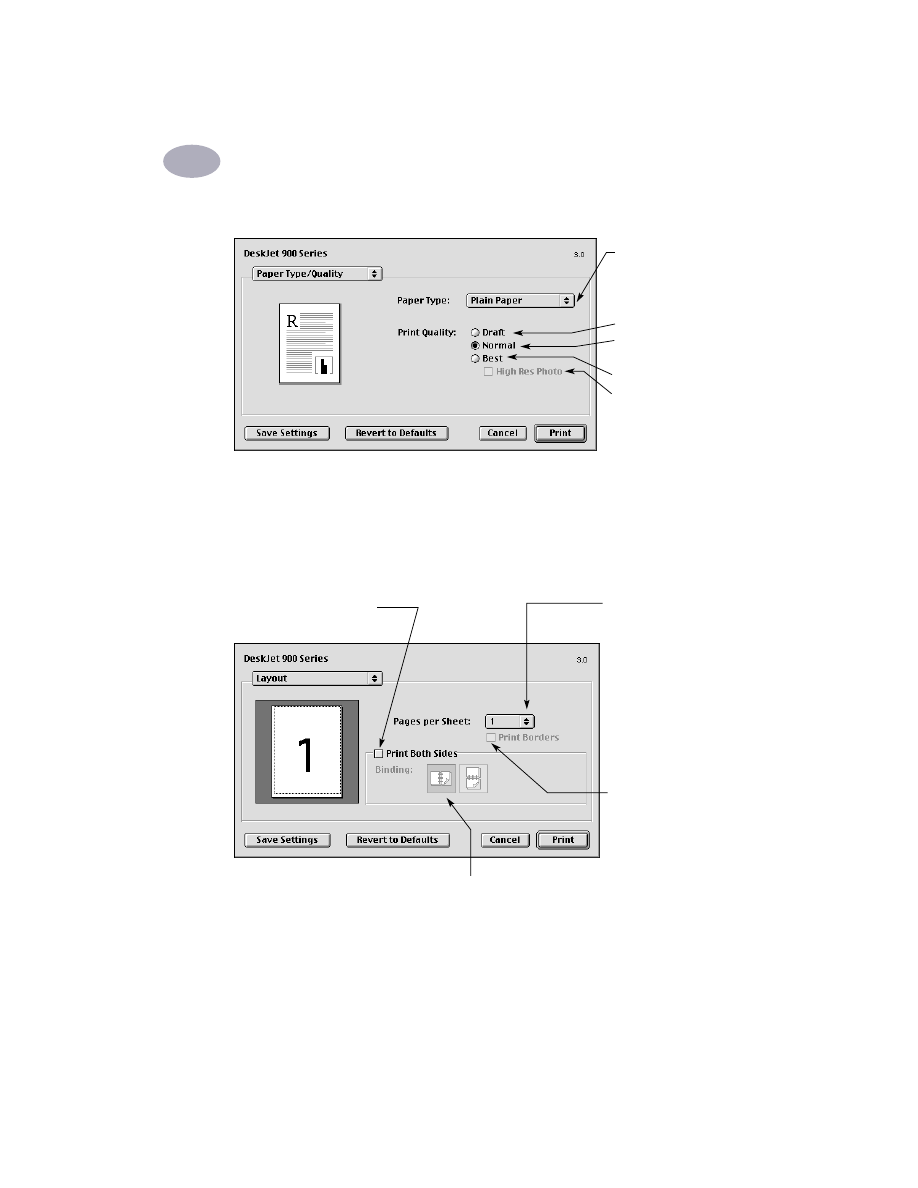
Paper Type/Quality
Layout
This dialog box allows you to specify the number of pages printed on each sheet
of paper, or to print a poster by specifying the number of pages printed across and
down.
Choose from a wide
range of paper types.
Print Quality
Draft
: Quick printing
Normal
: Everyday
printing
Best
: Highest quality
High Res Photo
: Photo
quality when photo
media and
Best
are
selected.
Choose the number of
pages (1, 2, or 4) to print
on each sheet. OR
Print a poster:
Choose the size of your
poster by choosing the
number of pages across
and down (
2x2
,
3x3
, or
4x4
).
Check to print a border
around each page.
Check here to print on
both sides of the paper.
If you check
Print Both Sides
, choose
appropriate
Binding
(side or top).
10
Using Your Printer Software
2
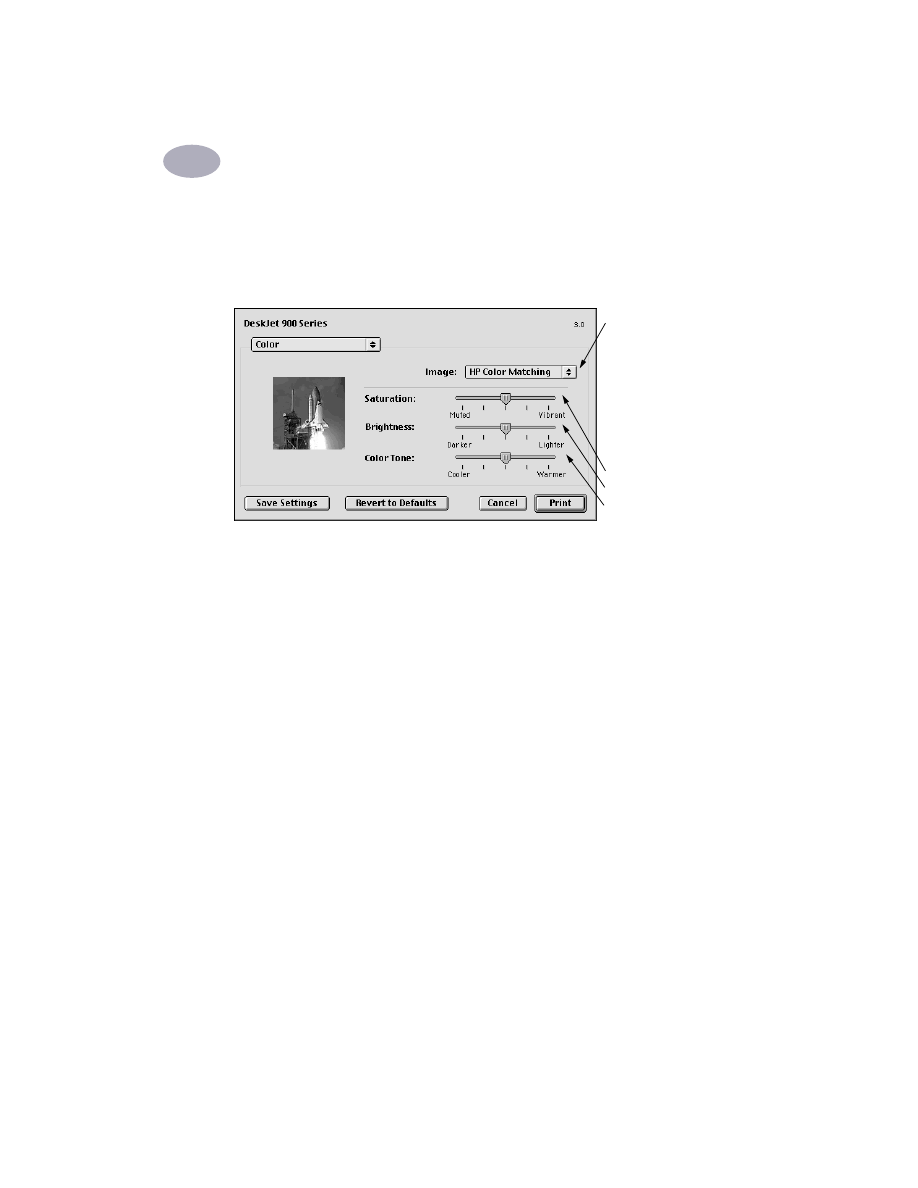
Color
Your HP DeskJet 900 Series printer uses HP’s Color Matching technology to
intelligently analyze each element on a page—text, graphics, and photographs—
and provide the best color output.
HP Color Matching
is the default
Image
setting on the Color panel. While you
can adjust saturation, brightness, and color tone with the sliders that appear when
you choose this option, the center position of the sliders is optimized for most
printing uses and types of media.
The
ColorSync
setting can be used for color matching with other components
using the ColorSync matching system.
Grayscale
prints in shades of gray. With this setting, you also have the option to
optimize printing for fax and photocopy.
Black & White
prints only in black and white (no color, no gray).
Choose:
•
HP Color Matching
(default)
•
ColorSync
•
Grayscale
(print in shades
of gray)
•
Black & White
(no color)
Slide to adjust:
• Saturation
• Brightness
• Color Tone
Using Your Printer Software
2
11
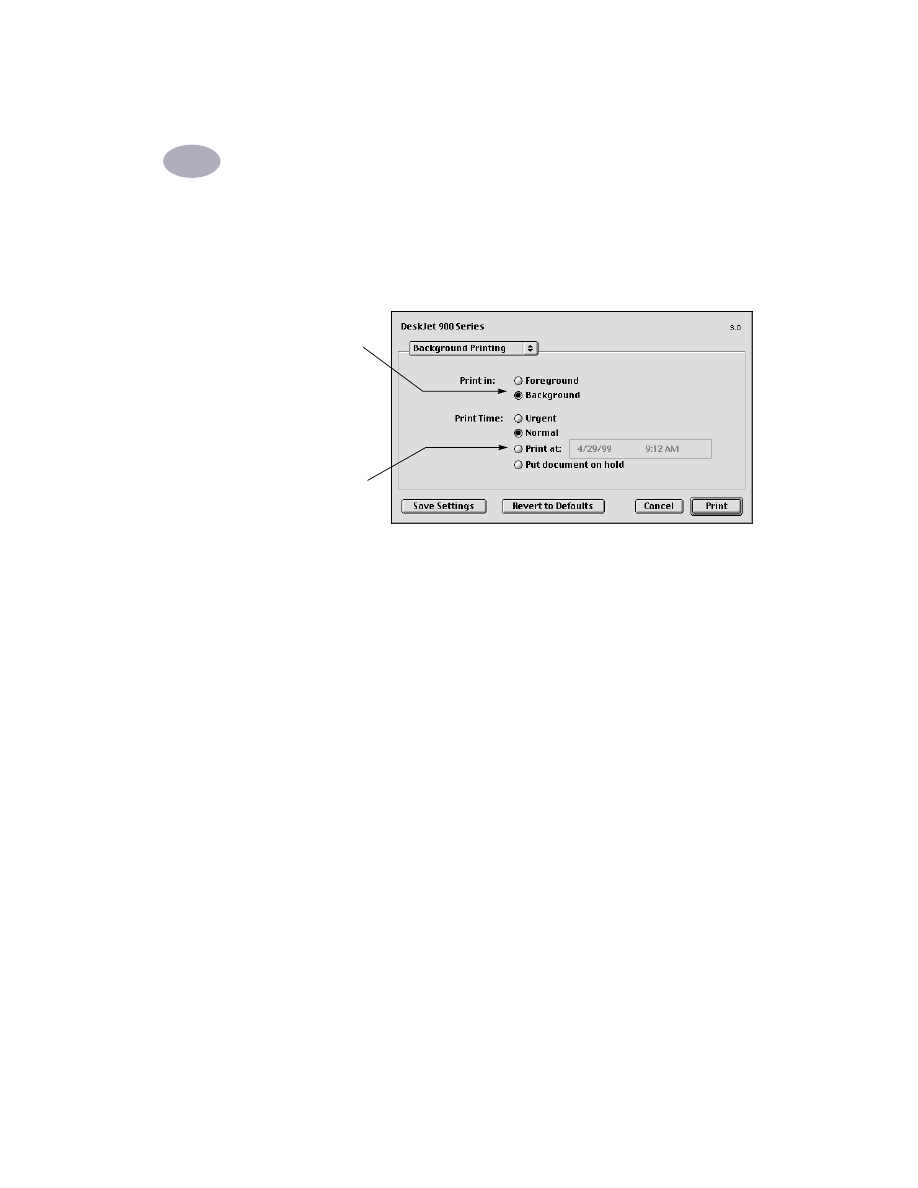
Background Printing
Choose
Background
if you want to continue working while printing takes place. If
you choose
Foreground
printing, printing will be faster, but you won’t be able to
work on other tasks until the printing is complete.
Choose:
•
Background
to
continue working
while printing
•
Foreground
for
faster printing
Click the button that
matches the desired
timing for your print
job
12
Using Your Printer Software
2
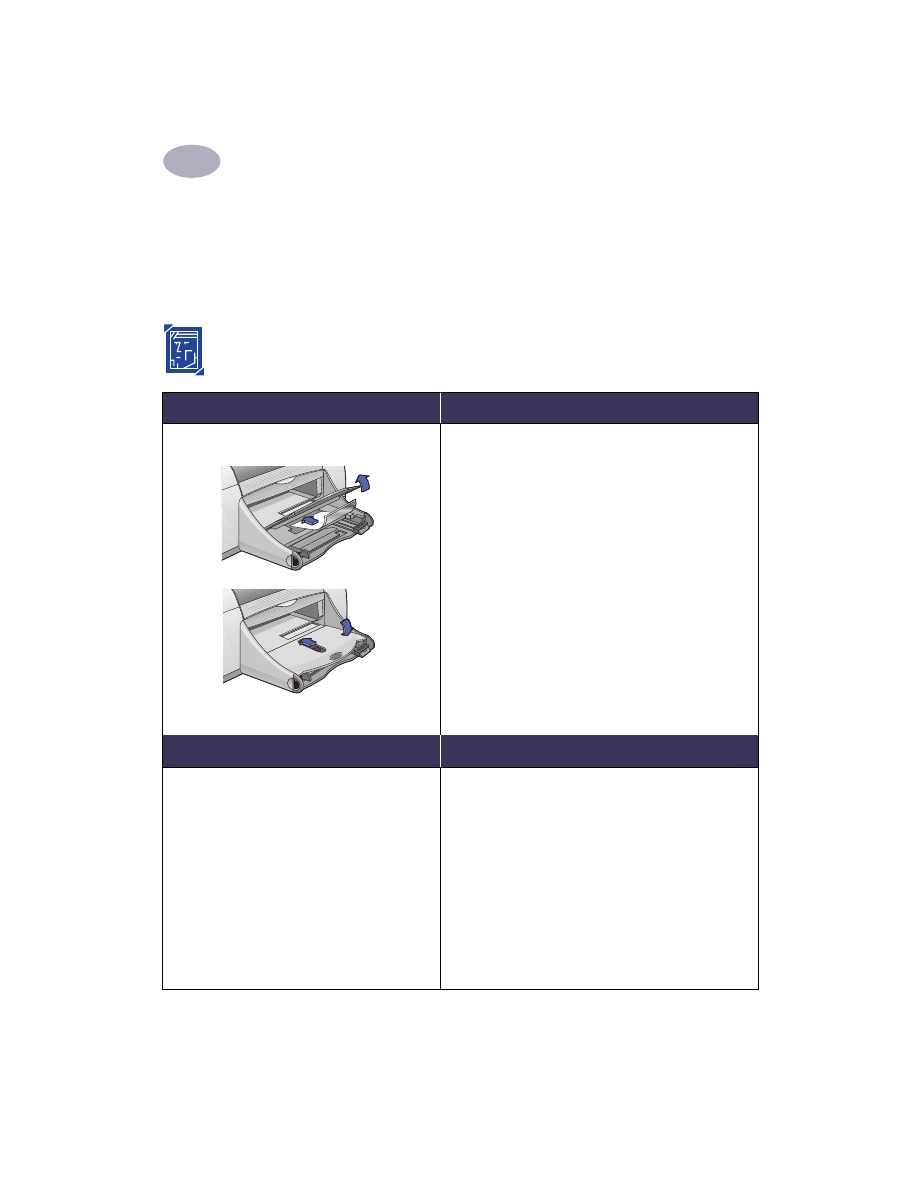
The following table describes additional features available when using
background printing. To access these features from the desktop, double-click
the
DeskJet 950C
printer icon.
Background
Printing Options
Instructions
Delete a print job
• Select the
job title
or icon, then click the
Trash
icon.
or
• Drag the document’s icon to the Trash on your desktop.
These methods delete only the print job, not the document itself.
Hold/pause a print job
• Select the
job title
or icon, then click the
Pause
button.
The print request will pause until you select its title again and
click the
Resume
button.
or
• Drag the document icon to the
Waiting to Print
list of
documents.
Mark a print request
“Urgent”
• Select the
job title
or icon, then click the
small clock
.
• In the dialog box that appears, click
Urgent
. This moves the
print request to the top of your print list.
Print at a specific time
• Select the
job title
or icon, then click the
small clock
.
• In the dialog box that appears, click
At Time
, then set the
time
and
date
to print.
Sort/change the order
of print jobs
• From the
View
menu, choose the
title of the column
by which
you want to sort or choose.
• To see and change the print order, sort by
Print Time
.
• Drag and drop the print
job title
to the desired place in the list.
Stop and restart
printing
• Choose
Stop Print Queue
from the
Printing
menu.
• To resume printing, choose
Start Print Queue
.
This is a good way to save print requests when using a PowerBook
while away from your printer.
Change printers
To move a print job from one printer to another printer of the
same type:
• Drag the
icon
for the print request to the icon of the
desired
printer
.
If you’re not sure whether the two printers are of the same type,
try moving the print request anyway; the printer software won’t let
you move a print request to an incompatible printer.
Using Your Printer Software
2
13